Spot Removal
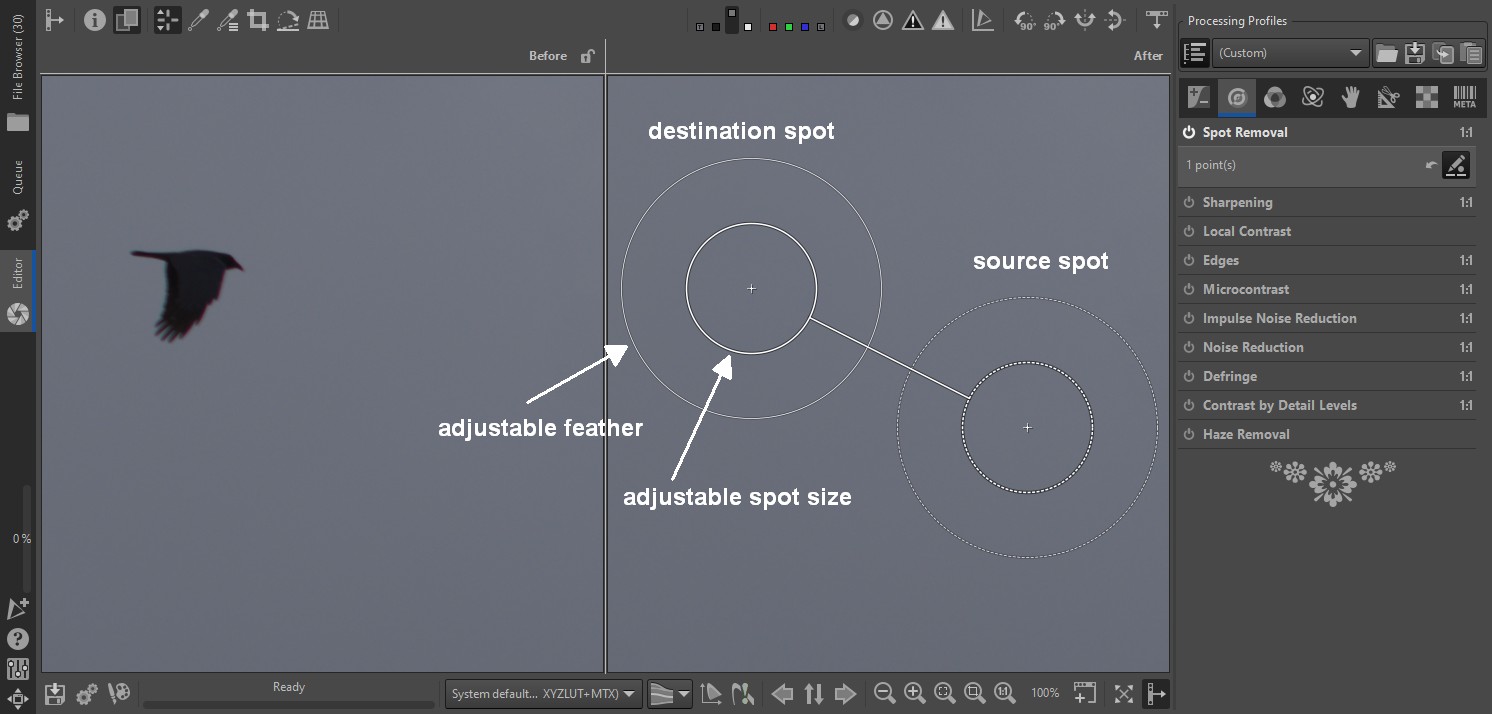
The spot removal tool can be used to mask portions of an image (e.g. blemishes, sensor dust) with another part of the same image. You can even use it to remove entire objects from an image, like in the example below.
Activate spot editing mode
In order to add, remove or change spots, the spot editing mode needs to be active. Toggle this mode using the ![]() button.
button.
Adding spots
Ctrl-click on the location that you want to mask ("destination", solid lines) and drag the mouse to set the replacement location ("source", dotted lines). The area under the source will replace the area of the destination. A line connects the two areas, which helps identification if you add multiple spots. You can move both areas after placement by clicking within the inner circle and dragging. The thicker inner circle determines the size of the replacement area, the outer line determines a feather that gradually blends with the surrounding image. Both circles can be adjusted in size after the spot has been placed (within a certain size range).
Removing spots
Right click on any part of the spot to remove it.
